When we encounter situations such as insufficient computer storage, slow startup, and lagging operation, it is time to replace/install a suitable solid-state drive. So how should I operate it?
To briefly introduce, it is divided into the following 4 steps:
1. Check the battery and machine operation status;
2. Check if the machine supports replacing SSDs;
3. Determine the specifications and models of the SSD to be replaced;
4. Disassemble and replace/install SSD.
Firstly, check the battery and machine operation status.If it is an old computer that has been idle for a long time, we need to first check the battery and the running condition of the machine. Because lithium batteries have a lifespan, long-term use can easily cause the battery to starve to death. First check: Can it be charged? Can it be turned on? Can it be filled? How long can 100% battery last? If the operating status is good and the battery is in good condition, then consider the next step.
Secondly, check if the machine supports replacing SSDs.Currently, whether it is a laptop or a desktop computer, the commonly used ones are 2.5-inch SATA SSDs or M.2 SSDs. Therefore, it is necessary to first search the technical documentation or disassembly diagram online to clarify whether your machine supports replacing SSDs.
If the old computer was originally equipped with a mechanical hard drive, theoretically it can be replaced with a 2.5-inch SATA SSD. If there is a slot for M.2 interface, M.2 SSD can be replaced or installed.
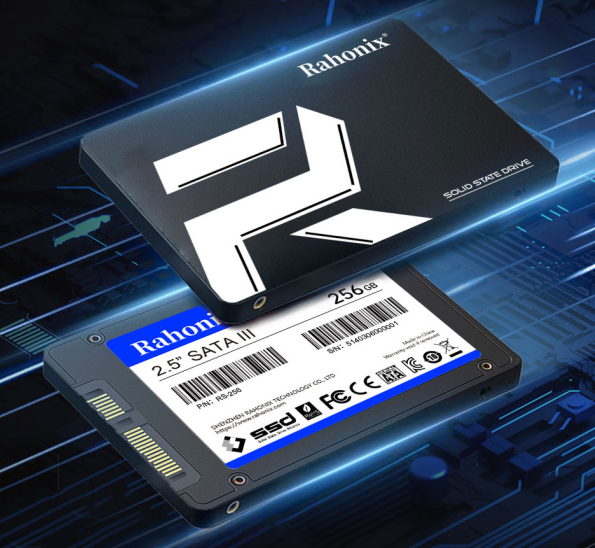
Thirdly, determine the specifications and models of the SSD to be replaced.1. How to install a 1.2.5-inch SATA SSD?
There is a SATA interface on the motherboard, so we only need to use the SATA data cable that comes with the motherboard. One end is plugged into the motherboard interface, and the other end is plugged into the corresponding interface on the hard drive body.
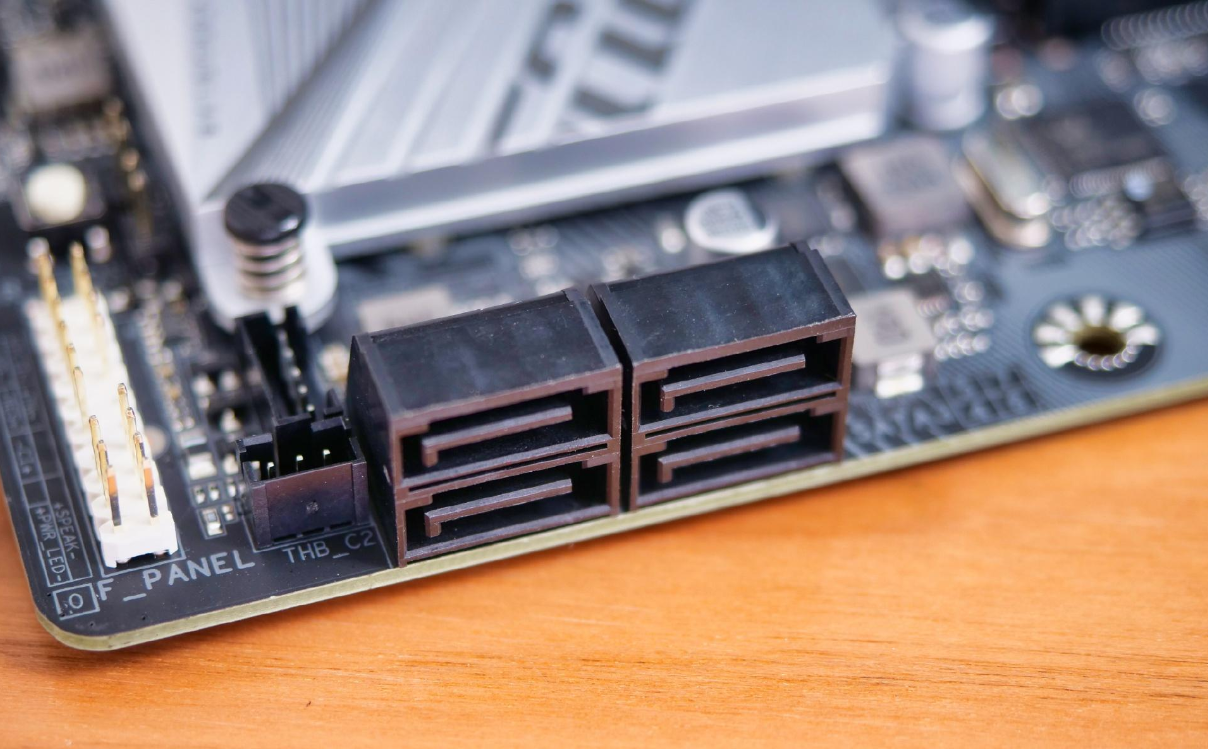
Both hard disk drives and SSDs require additional power supply for 2.5-inch hard drives. On desktop computers, we can also plug the SATA power cable of the power supply into the disk interface.
For some old laptop users who use 2.5-inch hard drives, after removing the back cover of the laptop, you should be able to see the installation position of the original hard drive. Simply unplug the old hard drive and insert the new one to complete the replacement.
2. How to install M.2 solid-state drive?
Some friends may say, isn't it enough to plug in the M.2 solid state and tighten the screws? Actually, there are also things to pay attention to here
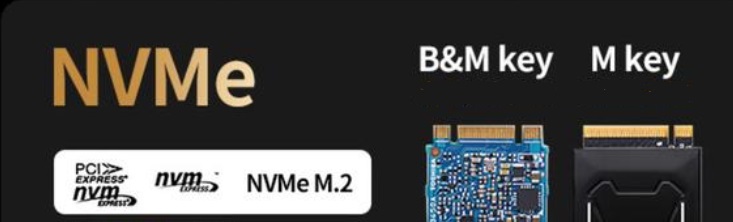
M. 2-slot is the mainstream interface used by laptop/desktop SSDs in recent years. Early versions (with the B Key notch on the left) supported SATA protocol, but it has now been completely phased out. In the past three to five years, most laptops have supported NVMe (PCIe protocol), and most of the new SSDs available now are NVMe (with the M Key notch on the right). Before upgrading and purchasing SSDs, you can check the current SSD gap position on the product website or open the machine to determine the SSD model that needs to be upgraded.
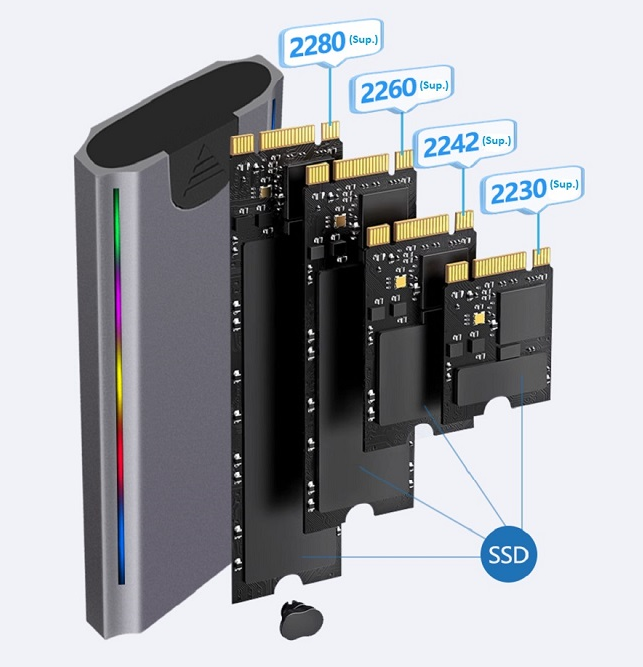
In addition to the interface, the current main sizes of M.2 SSDs are 2230/2242/2260/2280, as well as the occasionally visible 22110 on desktop computers and the future 25110. Here, 22 represents the width of M.2 SSD in millimeters, while 30/42/60/80/110 represents the length of SSD in millimeters. Most laptops use 2242/2280 SSDs. The length information can also be queried through the official website/customer service, or measured using the size and length at hand. As shown in the following diagram of the portable hard drive enclosure, you can click
here to enter the interface of the portable SSD enclosure.
PCIe Gen3 (3.0) and PCIe Gen4 (4.0)
At present, mainstream consumer SSDs use PCIe Gen3 (also written as 3.0) and Gen4 (also written as 4.0) protocols, with the main difference being the speed. PCIe Gen4 SSDs can also operate in Gen3 mode. Without considering protocol and encoding overhead, the bandwidth of PCIe Gen4 is 8000MB/s (approximately 7850MB/s considering protocol overhead), while the bandwidth of PCIe Gen3 is 4000MB/s (approximately 3930MB/s considering protocol overhead).
It should also be noted that the speed of the interface is not only affected by SSD, but also by the motherboard/CPU.
So when choosing an SSD, you need to consider the specifications of your laptop/motherboard, otherwise spending more money on a PCIe Gen4 SSD with higher speed still won't be able to enjoy faster speeds.
Single sided and double-sided
For laptop users, SSDs should also be noted that SSDs are generally divided into single-sided and double-sided. Here, double-sided refers to SSDs with chips placed on both sides, and their thickness is thicker compared to single-sided SSDs (where only one side has components). The vast majority of ultrabooks and gaming laptops on the market are limited by thickness and require the use of single-sided SSDs, while desktop computers generally do not have this restriction.
Laptop: generally only supports single-sided
SSD desktop/mini host: generally supports single-sided/double-sided SSDs.
Fourth, disassemble and replace/install SSD.Special attention: Before replacing the hard drive, be sure to unplug the power and battery plug, and do not operate with the power on!
The installation method is also very simple. Firstly, the computer must be powered off, and for laptops, it is best to unplug the power cable from the motherboard. Let's go find a place with a metal faucet to wash our hands. Touch the faucet to release static electricity on our body. After drying our hands, insert the golden fingers of the solid-state drive into the M.2 slot, and then fix it with screws or tool free buckles on the other end.
In this regard, all M.2 SSDs from Rahonix are equipped with at least one screw for customer use. Of course, if you also need a free screwdriver during the purchase process, you can contact sales or customer service to leave a note for you.
If there are multiple M.2 slots on the motherboard, we can insert the new disk into the available slots and directly boot up to enter the Windows system for initialization operations.
If you are using a laptop or a desktop motherboard with only one M.2 slot and want to reinstall the system directly, you can simply replace the original SSD without further explanation.
As for how to use a solid-state drive after installation, we will provide a detailed explanation in subsequent articles.


